I’ll be adding tutorials about coding for the TB2 as I find time.
Here’s a first small tutorial about using the TB2’s LCD display.
I’ll be adding tutorials about coding for the TB2 as I find time.
Here’s a first small tutorial about using the TB2’s LCD display.
Got a mention on a recent DIY synth megthread on Reddit. Time to try out their new comment embed feature:
I’ve discovered to my shock that the type definition “prog_uchar” that I’ve been using to place data in SRAM has been deprecated in the latest version of the IDE (Arduino 1.6.0). It means that most of the firmware for the MB won’t compile in the latest IDE!
While I update the code, the work-around is to not use Arduino 1.6.0, but instead to use the version before – Arduino 1.0.6. I’m working on a fix as we speak.
Done! 2015-03-13
And the latest IDE versio is no 1.6.1
I’ve made significant improvements to the Golf firmware for the MB.
The V026 firmware gives the Golf a heart transplant with a new interrupt based internal clock that is a lot more stable than before.
As MIDI slave the Golf also now responds promptly and reliably to incoming MIDI start messages.
The sequencer’s time division is now seperate from the clock (as slave or master). You can choose for the sequencer to to treat steps as 16th, 15th triplets, or 32nds.
Time divisions are save on a per pattern basis – when linking patterns, it’s possible to have patterns play back with different dime divisions.
Fire up the Golf with the V026 firmware and let me know if I’ve messed it up, or missed something.
It seems to be a common issue with the Arduino Due that after uploading firmware perfectly normally for a while, the computer suddenly can’t find the COM port for the Arduino Due anymore. It had me tearing out my hair at the start, but I think I’ve got it figured out.
First off, check which port is available in the Tools/Port drop down menu of the Arduino IDE, and see if it’s selected (on my machine the port sometimes changes). If there’s nothing there, try the following: if you’ve been using the programming port, try plugging the usb cable into the native port (or vice versa). It should pick it up on a different com port. Just remember to select the different board type from the drop down list at Tools/Board – Arduino Due (Programming Port) vs Arduino Due (Native USB Port). And also make sure the port is selected in theTools/Port drop down menu.
Uploading firmware seems to jog the Due’s memory, so once you’ve uploaded the firmware using the different port, you should be able to go back to the port you used before if you prefer. I always use the native port since I don’t need serial communications with the PC and uploading is much faster. The only downside is that you often have to reset the board manually – you can hit the reset switch without removing the board (it’s next to the contrast trimmer for the LCD), so it’s not a big problem.
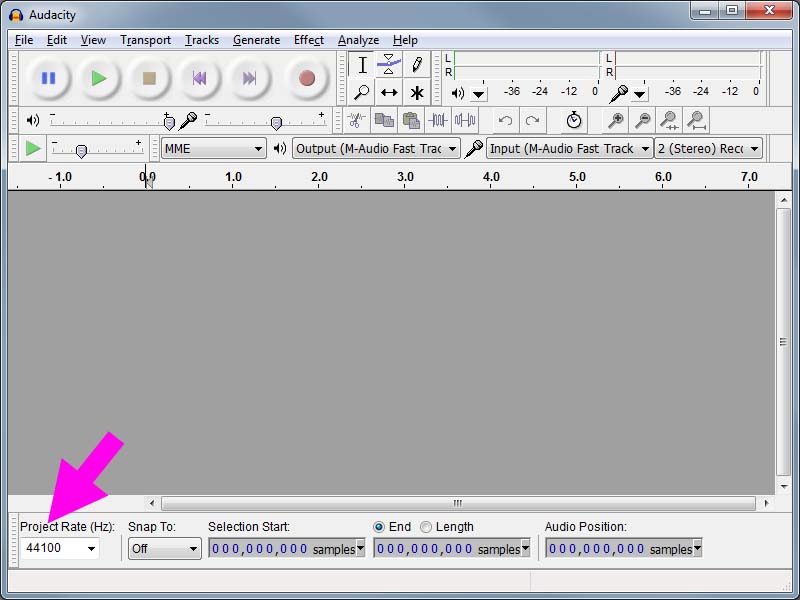
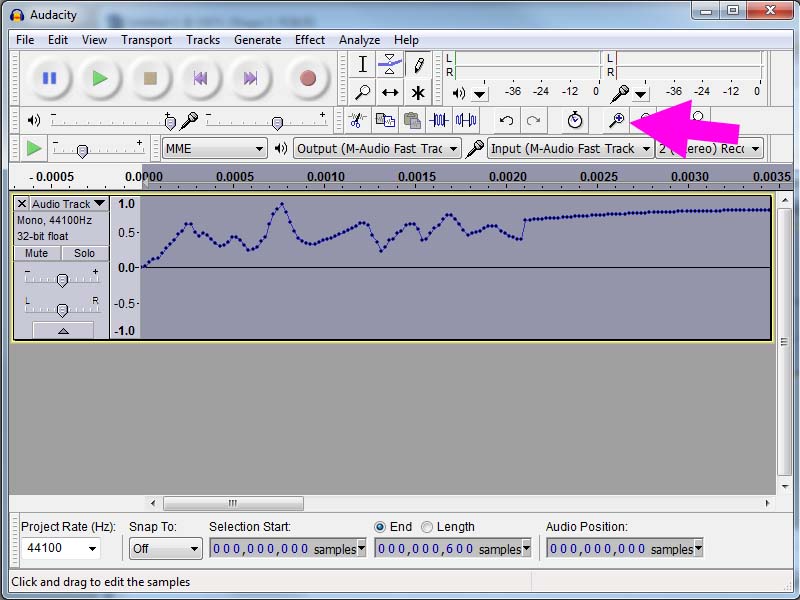
I’ve been using Adventure Kids awesome collection of single cycle waveforms (AKWF) to use with the TB2. His collection is so extensive that I haven’t really bothered to make my own. It turns out that rolling your own is really simple. Here’s how to go about it in Audacity (chosen here because it’s free and cross-platform).
The basics requirements for a single cycle waveform to use with the TB2 are as follows:
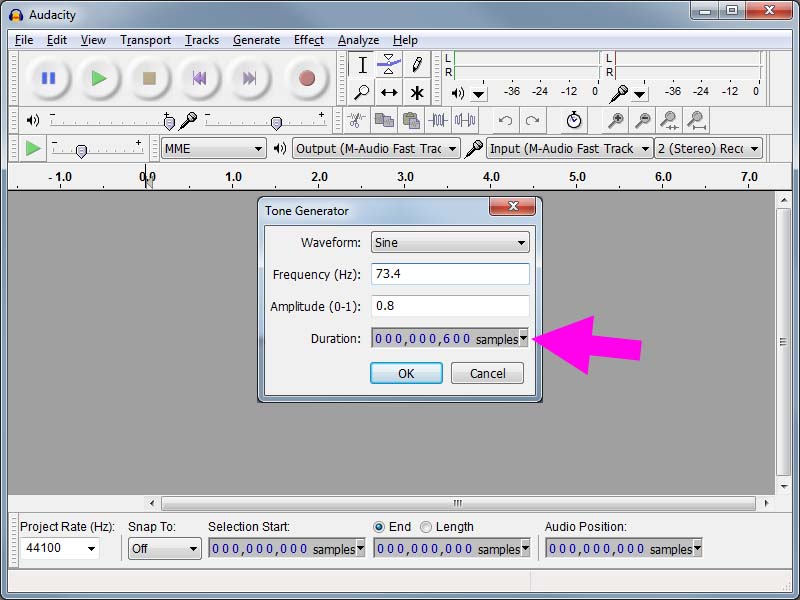
To generate a tone, do so at a frequency of 73.4Hz, or D2. Adventure Kid calls this D2 + 2, but I’m not sure what the +2 is for.
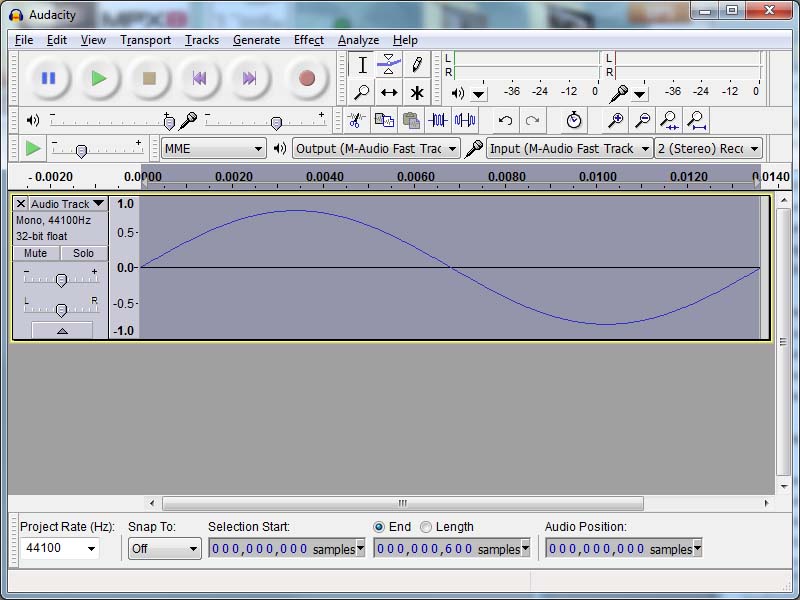
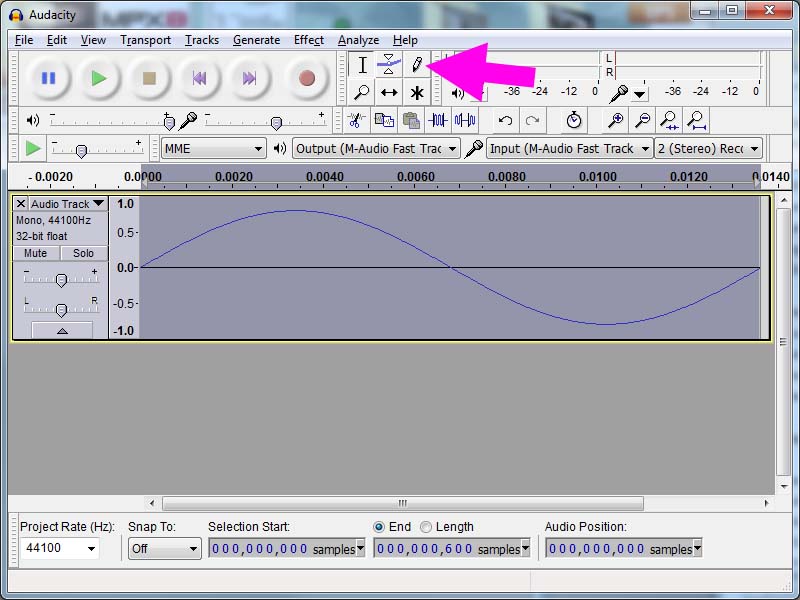
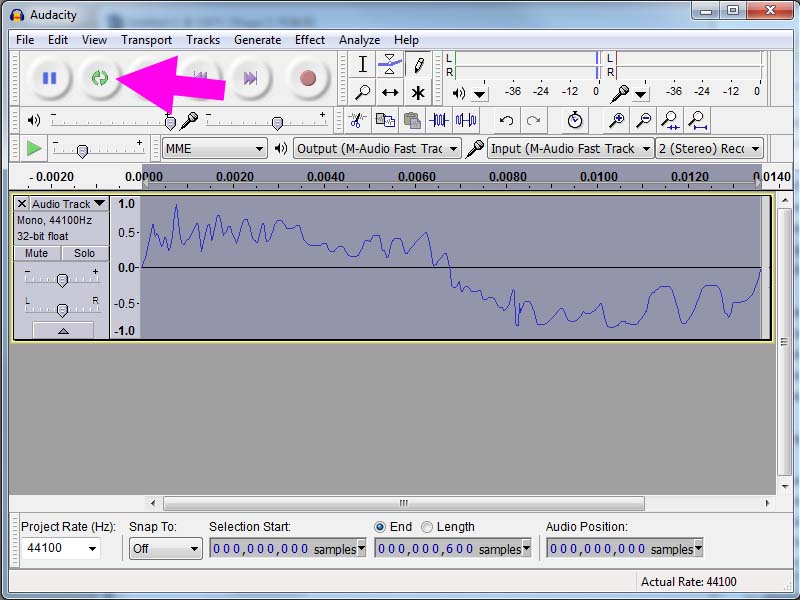
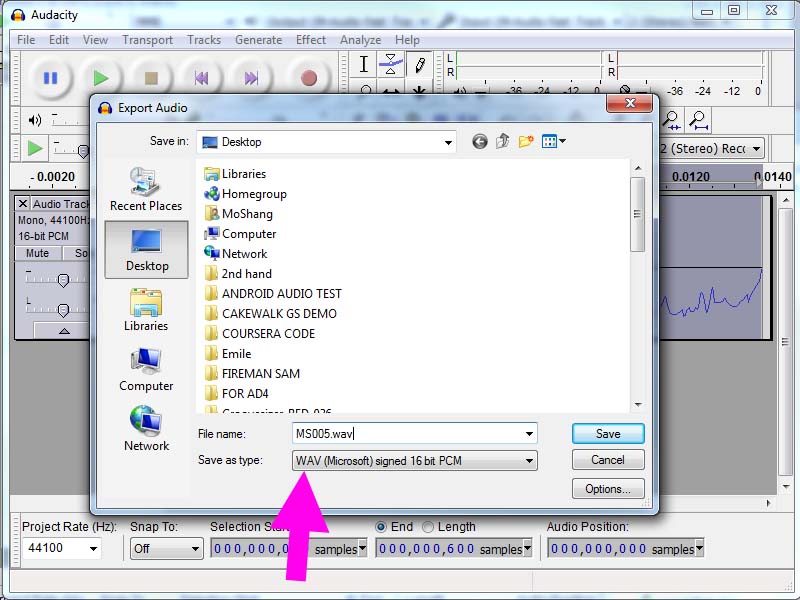
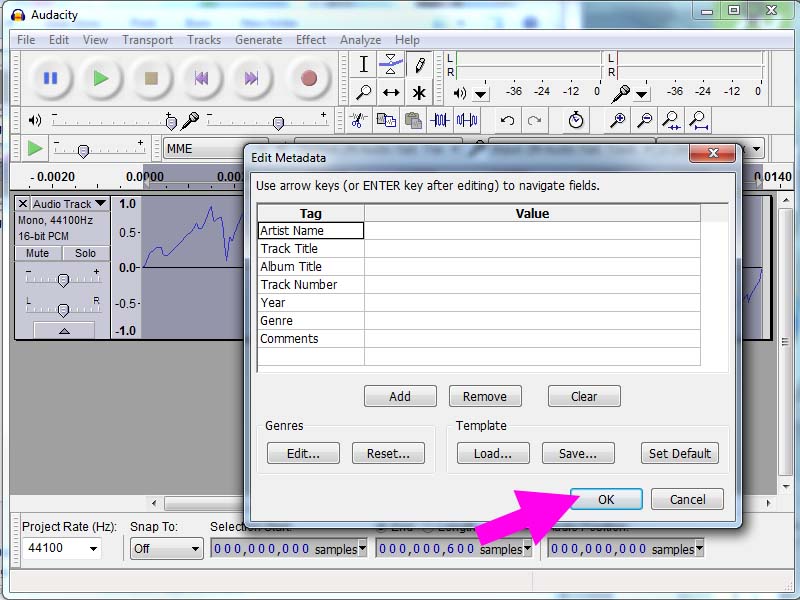
Here’s how to do it in Audacity step-by-step:


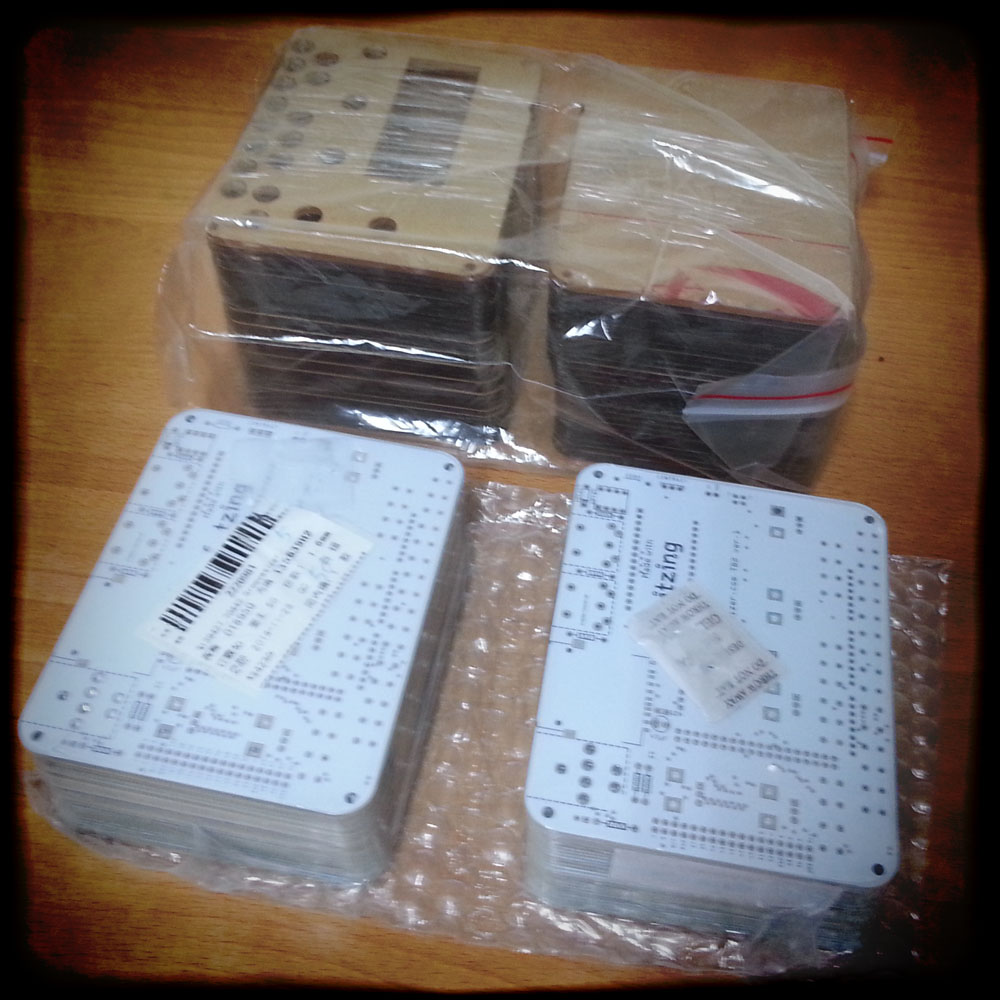
Fresh from the factory – the first batch of TB2 PCBs and housing plates. I’m finishing the firmware as I wait for parts to arrive. I’m hopeful I’ll have TB2 kits up for sale next week!
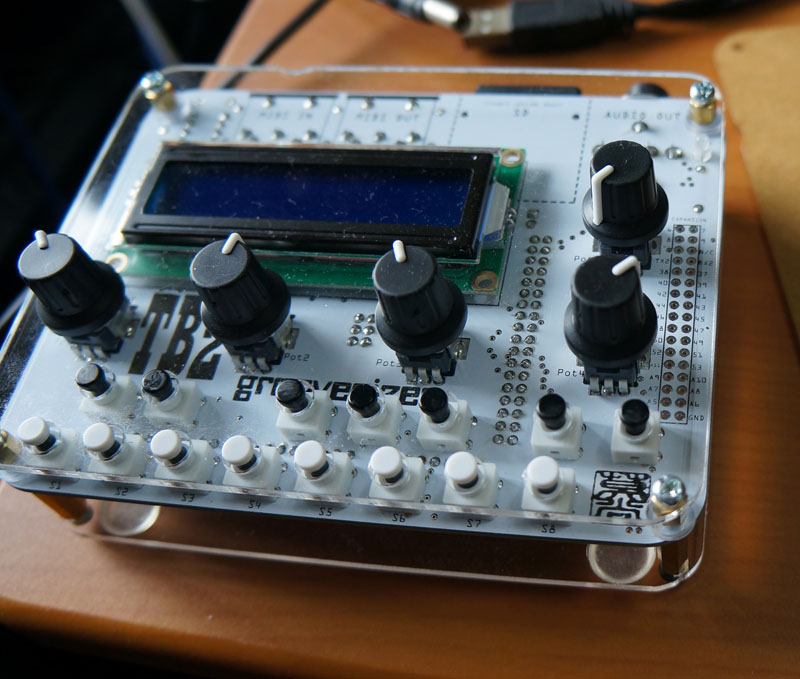
The TB2 is coming along nicely and is still on track to be released in December. I’ve been working on the latest version of the hardware. Notice the header on the right side, providing access to the unused analog and digital pins of the Arduino Due. As well as another tactile switch in the top row on the right, – these function as increment and decrement buttons.
 There are a couple more headers on the left edge for 5V, as well as the TX/RX pins for serial ports 0 and 3.
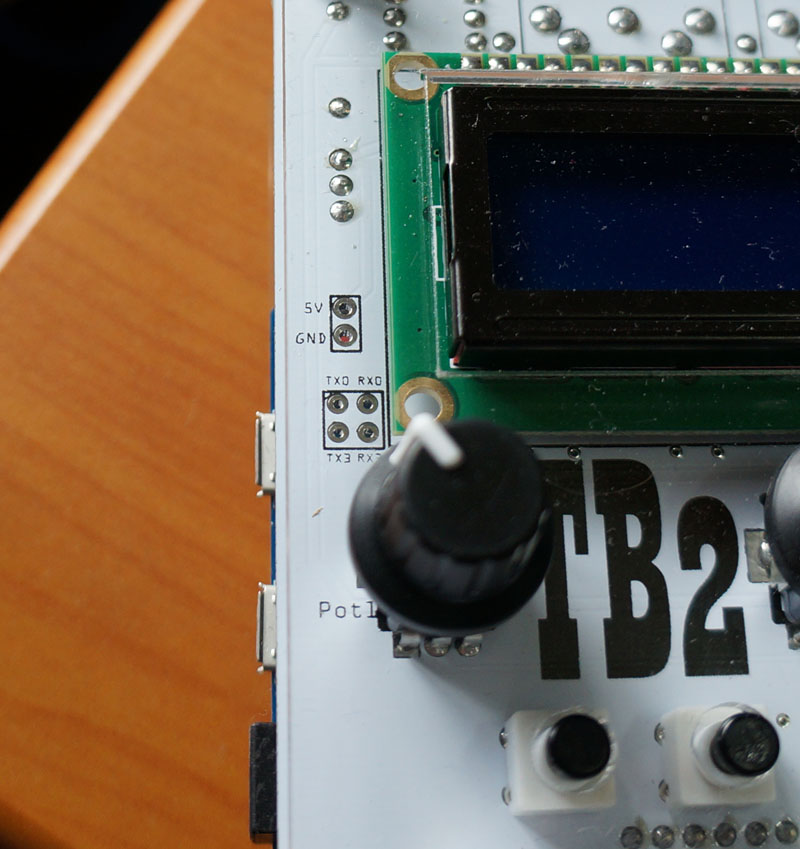
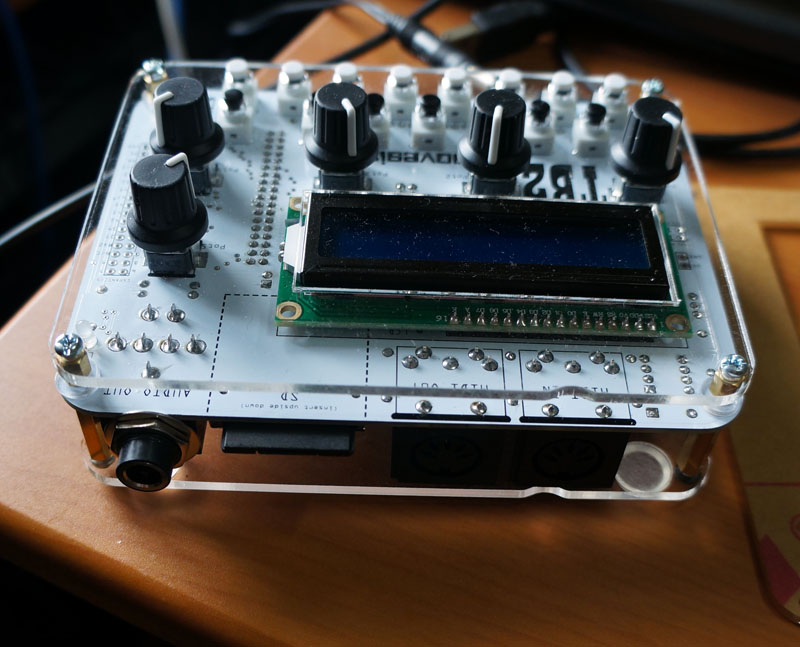
And some of you will be happy to see that the TB2 now sports a 1/4″ jack. The SD card slot has moved to the other side of the PCB, and cards are now inserted upside down – it’s not a biggy after all.
The PCB design is now final, but the last change I want to make is to go back to the larger style caps for the tactile switches that I used on the previous prototype. The small ones are hell on the fingers!
 On the firmware side, I implemented the arpeggiator on the weekend, and it’s working sweetly!
Here’s a more complete preview of the synth side of the TB2 (the arpeggiator and sequencer are still being written). I expect the TB2 to become available in December 2014.