Part 1
There are 15 buttons on the TB2. They’re connected chromatically to i/o pins 22 through 36. To be more explicit, the white buttons are connected (from left to right) to pins 22, 24, 26, 27, 29, 31, 33, and 34. The black buttons are connected to 23, 25, 28, 30, 32, 35, and 36.
Since a button can only ever be on or off (pressed or not), we can read the state of a button with the digitalRead() function which returns the value of the pin as HIGH (+3.3V) or LOW (0V). In the first example, we’ll turn on the LED if the leftmost white button is pressed.
First, we assign the button and LED pins to variables.
int button = 22; // the leftmost white button
int led = 13; // the pin the LED is connected to
In the setup() function, we set the pinmodes for the two i/o pins (LED as output, button as input).
void setup() {
  pinMode(led, OUTPUT); // set the LED pin to an output
  pinMode(button, INPUT); // set the button pin to an input
}
In our loop() function, we get the current state of the button pin and write it to the LED pin.
void loop() {
 int buttonState = digitalRead(button); // read the current value of the button pin to the buttonState variable
 digitalWrite(led, buttonState); // write the buttonState value to the
}
Here’s the code in full.
int button = 22; // the leftmost white button
int led = 13; // the pin the LED is connected to

void setup() {
  pinMode(led, OUTPUT); // set the LED pin to an output
  pinMode(button, INPUT); // set the button pin to an input
}

void loop() {
  int buttonState = digitalRead(button); // read the current value of the button pin to the buttonState variable
  digitalWrite(led, buttonState); // write the buttonState value to the
}
That didn’t work out quite as expected! Now the LED is always on until you press the button. It turns out the buttons on the TB2 are wired to be HIGH by default and to go down to ground (0V / LOW) when they’re pressed. One way to solve the problem is to flip the polarity of the reading when we write it to the LED with !.
digitalWrite(led, !buttonState);
You may notice odd behavior when you release the button. Sometimes the LED seems to flicker, or there is some lag before the LED turns off when the button is released. We can improve the situation a lot by making sure the unpressed button is pulled to a know state by adding _PULLUP when we define the button’s pin mode in our setup() function. (Read more about the Arduino’s internal pullups here.)
pinMode(button, INPUT_PULLUP);
The updated full code looks like this.
int button = 22; // the leftmost white button
int led = 13; // the pin the LED is connected to

void setup() {
  pinMode(led, OUTPUT); // set the LED pin to an output
  pinMode(button, INPUT_PULLUP); // set the button pin to an input and pull it high
}

void loop() {
  int buttonState = digitalRead(button); // read the current value of the button pin to the buttonState variable
  digitalWrite(led, !buttonState); // write the buttonState value to the
}
Part 2
While this approach works for a quick and dirty example, it leaves a lot to be desired. One issue we haven’t touched on yet is button bounce. While it appears as if the LED turns on and off exactly like we expect, you would probably see it flickering on and off if you were to slow time right down. The reason for this is that the button bounces mechanically when pushed and released. To get an accurate reading, you are going to have to find a way to debounce the buttons.
Another problem is that only knowing if a button is pressed is not enough information to base a full user interface on. In addition to knowing whether a button is pressed, it’s also useful to know whether a button has just been pressed, or just been released. To solve all of these problems, I use this multi-button checker code written by ladyada/Limor Fried of Adafruit. Limor’s code is well explained in the comments in the code as well as in the user comments, so I’m not going to go over it here. Instead, I’ll show how to use it on the TB2.
For this demo, we’ll want to use the LCD, so we include the LCD library.
#include <LiquidCrystal.h>
Next, we’ll set up a variable for the LED and initialize the LCD.
// *** LED ***
int led = 13;

// *** LCD ***
// initialize the LCD library with the numbers of the interface pins
LiquidCrystal lcd(12, 11, 5, 4, 3, 2);
Then we’ll add the variables for the button checker. The button pins are stored in an array called buttons[], and later we can check the state of a button by checking the values in the arrays pressed[], justpressed[] and justreleased[].
// *** BUTTONS ***
#define DEBOUNCE 10  // button debouncer, how many ms to debounce, 5+ ms is usually plenty
// here is where we define the buttons that we'll use. button "22" is the first, button "36" is the last
byte buttons[] = {22, 23, 24, 25, 26, 27, 28, 29, 30, 31, 32, 33, 34, 35, 36};
// This handy macro lets us determine how big the array up above is, by checking the size
#define NUMBUTTONS sizeof(buttons)
// we will track if a button is just pressed, just released, or 'currently pressed'
byte pressed[NUMBUTTONS], justpressed[NUMBUTTONS], justreleased[NUMBUTTONS];
In the setup() function, we’ll start the LCD, clear the screen, and write Pressed: to it. We’ll also set the pin mode for the LED to output (remember we don’t need to set the pin mode if we’re using the LED as an analog output – in this case we want to use it as a digital output).
void setup() {
 // *** LCD ***
 // set up the LCD's number of columns and rows:
 lcd.begin(16, 2);
 lcd.clear();
 lcd.print("Pressed:");

 // *** LED ***
 pinMode(led, OUTPUT);
Next we’ll use a for-loop to iterate through the pins in the button[] array and set them all as inputs pulled HIGH. And we’ll close the setup() function with a }.
  // *** BUTTONS ***
  // Make input & enable pull-up resistors on switch pins
  for (byte i = 0; i < NUMBUTTONS; i ++)
    pinMode(buttons[i], INPUT_PULLUP);
}
Now we need to define a function to check the buttons. NOTE: the Arduino language allows you to define a function pretty much anywhere in the code (though it’ll complain at compile time if a function definition isn’t allowed somewhere). You also don’t need to declare a function with a prototype before defining it as you have to do in C. For the sake of readability, I put all the code related to the various sub-systems of the TB2s firmware in separate tabs, so you’ll find everything related to the buttons in the BUTTONS tab. The triangle on the right hand side of the TAB bar lets you add and delete tabs.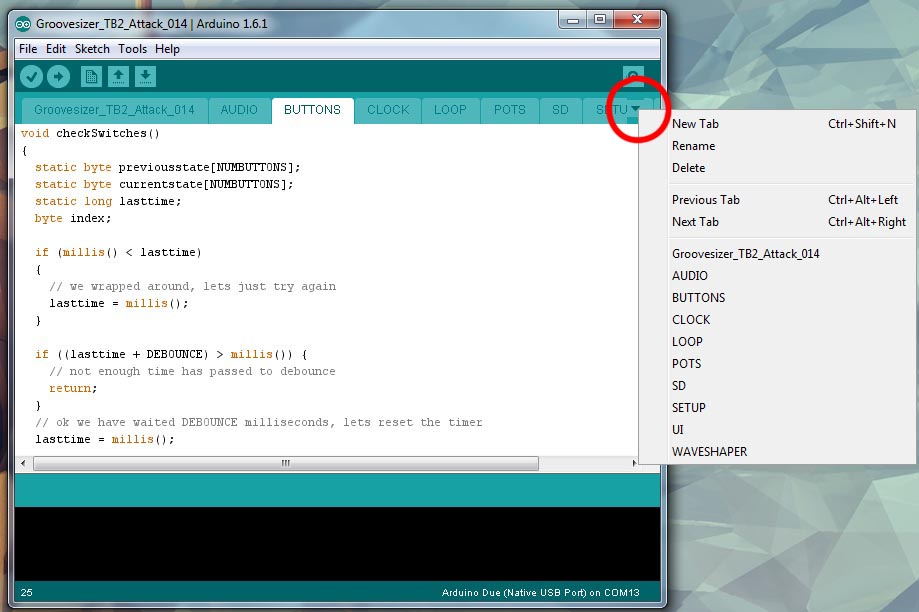
In this example, we’ll define the checkSwitches() function right after the setup() function.
void checkSwitches()
{
  static byte previousstate[NUMBUTTONS];
  static byte currentstate[NUMBUTTONS];
  static long lasttime;
  byte index;

  if (millis() < lasttime)
  {
    // we wrapped around, lets just try again
    lasttime = millis();
  }

  if ((lasttime + DEBOUNCE) > millis()) {
    // not enough time has passed to debounce
    return;
  }
  // ok we have waited DEBOUNCE milliseconds, lets reset the timer
  lasttime = millis();

  for (index = 0; index < NUMBUTTONS; index++) // when we start, we clear out the "just" indicators
  {
    justreleased[index] = 0;
    justpressed[index] = 0;

    currentstate[index] = digitalRead(buttons[index]);   // read the button

    if (currentstate[index] == previousstate[index]) {
      if ((pressed[index] == LOW) && (currentstate[index] == LOW)) {
        // just pressed
        justpressed[index] = 1;
      }
      else if ((pressed[index] == HIGH) && (currentstate[index] == HIGH)) {
        // just released
        justreleased[index] = 1;
      }
      pressed[index] = !currentstate[index];  // remember, digital HIGH means NOT pressed
    }

    previousstate[index] = currentstate[index];   // keep a running tally of the buttons
  }
}
Time for our loop() function. First, we’ll get the current state of the buttons by calling the new checkSwitches() function.
void loop() {
  checkSwitches(); // gets the current state of the buttons - defined in BUTTONS
NOTE: the checkSwitches() function resets the justpressed[] and justreleased[] arrays. So, if a button was just released (for example), the justreleased[] array will only return true for that button this time through the loop.
Next, we check the status of the pressed[] and justpressed[] arrays for each of the buttons with a for-loop. We offset the LCD cursor horizontally by the number of the button with lcd.setCursor(i, 1). Then we print either a space or an X depending on whether the button is pressed or not. We also turn on the LED if a button was just pressed. Finally, we close the loop with }.
  for (int i = 0; i < 15; i++)
  {
    lcd.setCursor(i, 1);
    if (pressed[i])
      lcd.print("X");
    else
      lcd.print(" ");

    if (justpressed[i])
      digitalWrite(led, HIGH);
    else
      digitalWrite(led, LOW);
  }
}
Here’s the full code.
#include <LiquidCrystal.h>

// *** LED ***
int led = 13;

// *** LCD ***
// initialize the LCD library with the numbers of the interface pins
LiquidCrystal lcd(12, 11, 5, 4, 3, 2);

// *** BUTTONS ***
#define DEBOUNCE 10  // button debouncer, how many ms to debounce, 5+ ms is usually plenty
// here is where we define the buttons that we'll use. button "22" is the first, button "36" is the last
byte buttons[] = {22, 23, 24, 25, 26, 27, 28, 29, 30, 31, 32, 33, 34, 35, 36};
// This handy macro lets us determine how big the array up above is, by checking the size
#define NUMBUTTONS sizeof(buttons)
// we will track if a button is just pressed, just released, or 'currently pressed'
byte pressed[NUMBUTTONS], justpressed[NUMBUTTONS], justreleased[NUMBUTTONS];

void setup() {
  // *** LCD ***
  // set up the LCD's number of columns and rows:
  lcd.begin(16, 2);
  lcd.clear();
  lcd.print("Pressed:");

  // *** LED ***
  pinMode(led, OUTPUT);

  // *** BUTTONS ***
  // Make input & enable pull-up resistors on switch pins
  for (byte i = 0; i < NUMBUTTONS; i ++)
    pinMode(buttons[i], INPUT_PULLUP);
}

void checkSwitches()
{
  static byte previousstate[NUMBUTTONS];
  static byte currentstate[NUMBUTTONS];
  static long lasttime;
  byte index;

  if (millis() < lasttime)
  {
    // we wrapped around, lets just try again
    lasttime = millis();
  }

  if ((lasttime + DEBOUNCE) > millis()) {
    // not enough time has passed to debounce
    return;
  }
  // ok we have waited DEBOUNCE milliseconds, lets reset the timer
  lasttime = millis();

  for (index = 0; index < NUMBUTTONS; index++) // when we start, we clear out the "just" indicators
  {
    justreleased[index] = 0;
    justpressed[index] = 0;

    currentstate[index] = digitalRead(buttons[index]);   // read the button

    if (currentstate[index] == previousstate[index]) {
      if ((pressed[index] == LOW) && (currentstate[index] == LOW)) {
        // just pressed
        justpressed[index] = 1;
      }
      else if ((pressed[index] == HIGH) && (currentstate[index] == HIGH)) {
        // just released
        justreleased[index] = 1;
      }
      pressed[index] = !currentstate[index];  // remember, digital HIGH means NOT pressed
    }

    previousstate[index] = currentstate[index];   // keep a running tally of the buttons
  }
}

void loop() {
  checkSwitches(); // gets the current state of the buttons - defined in BUTTONS

  for (int i = 0; i < 15; i++)
  {
    lcd.setCursor(i, 1);
    if (pressed[i])
      lcd.print("X");
    else
      lcd.print(" ");

    if (justpressed[i])
      digitalWrite(led, HIGH);
    else
      digitalWrite(led, LOW);
  }
}
Change the line if (justpressed[i]) to if (justreleased[i]) to see the LED flash when a button is released.
Grab the code for the final example here: TB2_004_BUTTONS