Author: moshang

  • Coming soon: Groovesizer mk1 kits

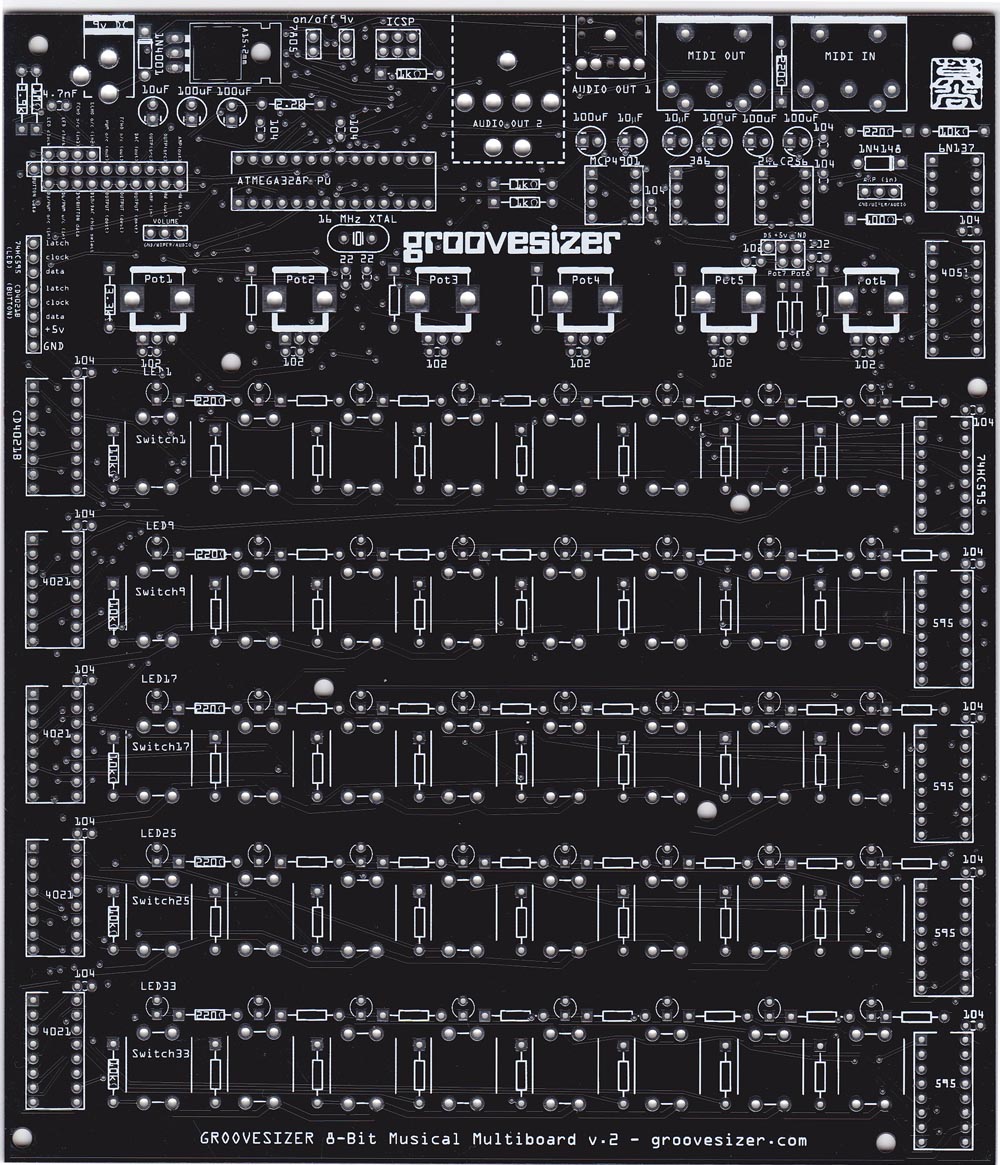
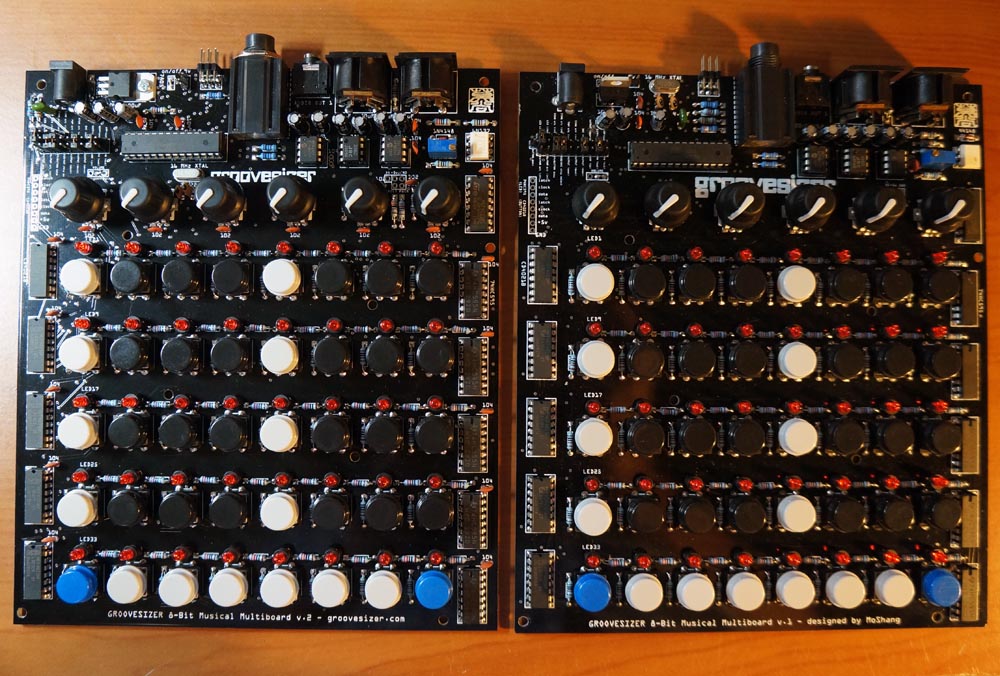
    The original Groovesizer mk1 is still getting quite a bit of attention, so I’ve decided to offer it in kit form, too. I wanted to keep it simple and as close to the original as possible, but at the same time I couldn’t resist improving on some of the shortcomings of the first design. I’ve added two shift registers so that now there is an LED for each of the 16 steps – with some pins to spare broken out on an expansion header). I’ve also added a MIDI input alongside the output, so that it can be played as a standalone instrument, or synced to external devices.

    Some prototype boards are being fabbed as we speak. It should be a great beginners kit with a low parts count and price. Groovesizer mk1_pcb

  • Bravo, Charlie, Delta, Echo – Proof-of-concept firmware videos

    The proof-of-concept firmware for the Bravo, Charlie, Delta, and Echo will go up on the site today or tomorrow. I’ve uploaded  first look videos to YouTube:

    Bravo:

    Charlie:

    Delta:

    Echo:

  • Foxtrot Firmware now available

    I’ve just released the Foxtrot firmware and there’s a growing implementation chart on the Foxtrot’s firmware page. It’s a MIDI controller, but far from being a one-size-fits-all controller, it’s meant specifically as a clip and scene launcher for Ableton. (And yes, it does mean there are other MIDI controller firmware planned, too.) The firmware is designed to fit in perfectly with my Ableton workflow, but I fully expect users to go in and fiddle with the firmware code to make it ideal for their own setup.

  • Steve Reichs’s Piano Phase – played on two Groovesizers

    I’ve wanted to do this for a long time – finally possible with a soon to-be-released Alpha firmware update.

  • Multiboard V2

    While we wait for the enclosures to arrive, I’ve taken the time to implement a host of improvements to the multiboard PCB. And before our brave pioneers feel short-changed,  the PCB is not functionally different in any way – rather the changes reflect sound design practice.

    Here’s the new board.

    Groovesizer V2 small

    For the following changes, I’m hugely indebted to Old Crow, a US-based synth builder with many years of experience (for a somewhat more involved DIY build than the Groovesizer, have a look at his crOwBX).

    • All power traces are now 32mils.
    • Lots of bypass capacitors – specifically on all of the multiplexer ICs.
    • The 7805 voltage regulator is now flat mounted.
    • The crystal and trim caps have been moved closer to the oscillator pins on the Atmega.
    • A ground plane now shields the various circuit elements from one another and from clock noise.
    • The serial input pin for 5th row 4021 is now terminated.

    Thanks also to Mutable Instruments‘ Olivier Gillet for suggesting the use of a 6N137 optocoupler in the MIDI input circuit to replace the 4N35 I’ve been using.

    Last but not least, thanks to Ewald Cress for insisting on the 1N4001 reverse polarity protection diode.

    V2 multiboard on the left, V1 on the right.
    V2 multiboard on the left, V1 on the right.
  • Template Firmware

    We’ve uploaded a template to help you get started rolling your own firmware. You can download it from the Template page.

    Here’s a quick look at what the template does.

  • Syncing the Groovesizer Alpha to Reaper

    Here’s a step-by-step guide for syncing the Groovesizer to Reaper.

    1. download the drumloop at http://www.freesound.org/people/Th3R3m1x3d/sounds/106552/

    2. create a new project in Reaper (File/New project)

    3. import the drumloop (Insert/Media file)

    4. in the track view, grab the right edge of the drumloop clip and use alt+drag to the start of bar2. this time-stretches the clip so it’s exactly a bar long

    5. copy and paste multiple instances of the drumloop clip so you have a good long stretch of drums and loop the section for good measure

    6. make sure you have a MIDI cable connected from your audio interface’s MIDI OUT to the Groovesizer’s MIDI IN

    7. Go to Options/Preferences/MIDI devices

    8. under “MIDI outputs to make available”, double-click your audio interface’s midi output

    9. on the “Configure MIDI Output” window that pops up, select both “Enable output to this device” and “Senc clock/SPP to this device”Reaper Sync

    10. when you press play on Reaper now, the Groovesizer will follow along in sync

    11. the offset appears to be different every time, so you’ll have to ensure the Groovesizer’s first beat aligns with the first beat of the bar in Reaper manually by pressing F1 on the Groovesizer (see the video below). Once aligned, it will stay in perfect sync until you stop playback.


  • Groovesizer Alpha & Shruthi-1: midi sync2

    In this video, two Groovesizers are locked together using midi sync – the black Groovesizer (on the right) is the sync master. A Mutable Instruments Shruthi-1 is played first via the black Groovesizer and then via the green one.