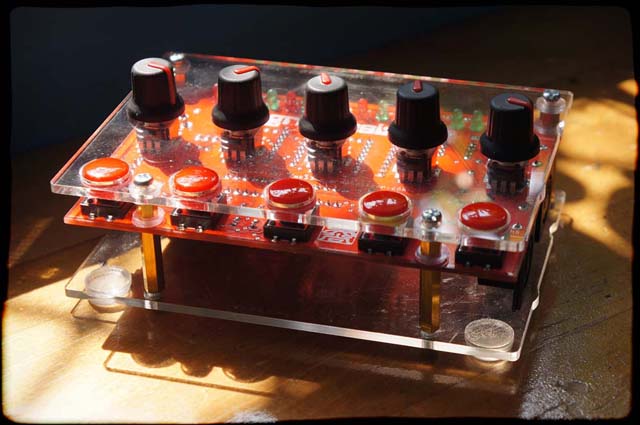
Allow me to introduce myself – I’m MoShang, sound-jeweler and lately accidental hardware manufacturer. I’m responsible for the Groovesizer range of DIY instruments. The Groovesizer MB (for Multiboard) is an Arduino-based 8-bit audio platform. Depending on the firmware, the Groovesizer MB can be a 32-step sequencer and synth, drum machine, or midi controller.
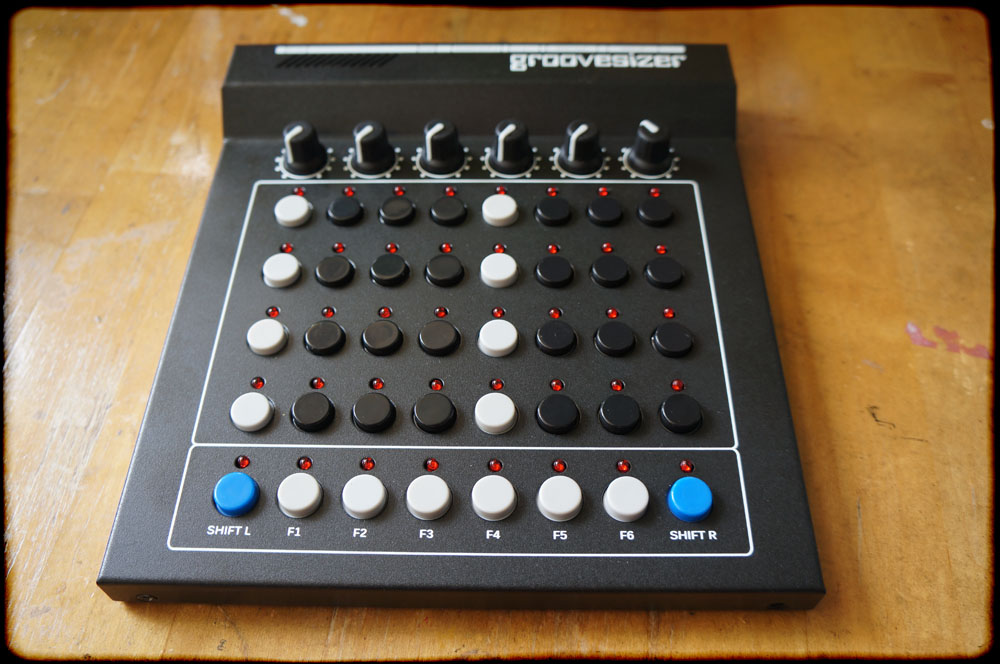
Here’s a demo track made in Sonar X2 (I’ve since upgraded to X3) to give you an idea of some of the sounds the Groovesizer MB is capable of – I’ve also used two REX loops by Coldcut that came included with X2.
I’ll go into the production details later in this post, but first a little back story as to how I arrived here.
Background
I started producing music with a PC in the early 90s – my first sequencer was a 386 running a copy of Cakewalk Apprentice that came with a Sound Blaster card. Various bits of outboard gear got added to my setup over the years until I decided to move to Taiwan from South Africa in 2003. Software had reached a point where I felt I could save myself the bother of moving a lot of gear and confidently let go of the hardware in favor of an all-software studio. For the most part it worked out really well for me, although over time I needed to scratch the itch for more hands-on control with a couple of hardware controllers.
My recent yo-yo back into the arms of hardware was precipitated by an embarrassing live show fail. Just before a gig, my notebook thought it would be a good time for an OS update, and foolishly I let it go ahead. Fast forward two hours and I find myself standing on stage with my MIDI wind controller useless in my hands – the OS update had managed to bork my sound card’s MIDI driver. Not fun!
I urgently started looking for a small hardware synth to use with my wind controller and discovered Mutable Instruments’ awesome Shruthi-1. The one caveat was that I needed to solder it myself from a kit, but having soldered my share of audio connectors over the years I wasn’t much daunted. Turns out soldering through-hole electronics is a lot easier than soldering connectors and a lot more fun. I felt a huge sense of achievement when my Shruthi fired up on the first attempt. I felt compelled to relive the experience by building a second Shruthi kit soon after – that one lives permanently in my gig bag now.
As I was building the Shruthis, I found myself more and more intrigued by the various components I was soldering and got myself an Arduino Uno to do some experimenting of my own.
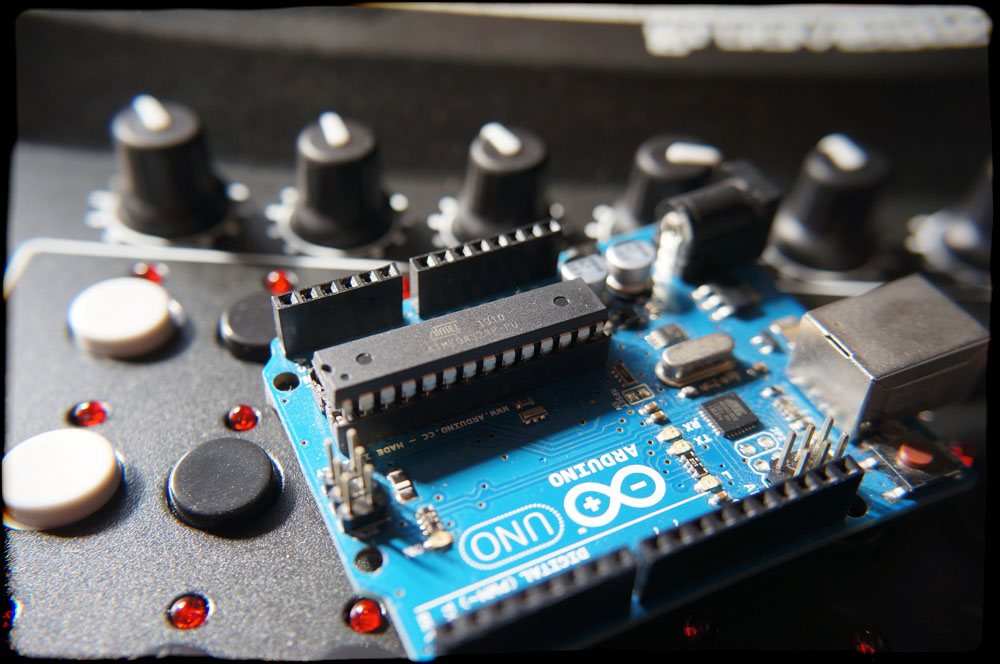
If you’re not familiar with the Arduino, here’s the elevator pitch from their website:
ARDUINO IS AN OPEN-SOURCE ELECTRONICS PROTOTYPING PLATFORM BASED ON FLEXIBLE, EASY-TO-USE HARDWARE AND SOFTWARE. IT’S INTENDED FOR ARTISTS, DESIGNERS, HOBBYISTS AND ANYONE INTERESTED IN CREATING INTERACTIVE OBJECTS OR ENVIRONMENTS.
They fail to mention that the dual challenge of building hardware and then writing code for it can be highly addictive! Basically, the Uno provides easy access to the digital and analog I/O pins on the Atmega328p microprocessor that’s the brains of the operation. What makes the Arduino platform so great for beginners is that there is a huge community of users who have written libraries for just about anything you may want to do. You can learn how to do the low-level stuff if you like, or skip it and just learn how to use the existing libraries. You bring your own level of programming skill – mine was virtually non-existent, so I gave myself a crash-course in the basics with the great free edX course CS50 – Introduction to Computer Science.
Evolution
For obvious reasons, I was most drawn to the various sound projects that people have created for the Arduino platform. After half a years’ worth of experimenting, I published my own project – the original Groovesizer mk1. I took the existing Auduino synth project and added a 16-step sequencer (complete with blinky lights and MIDI output) to it.
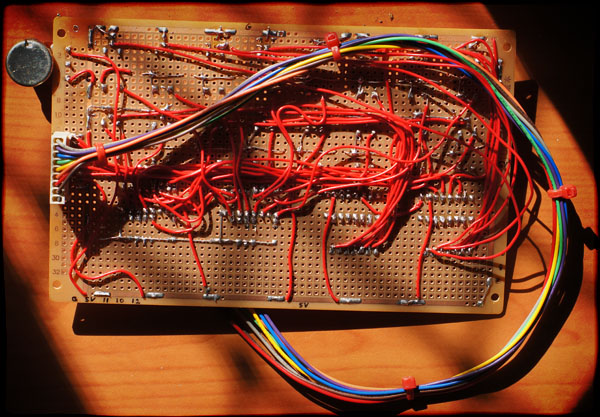
The obvious next step was to add more buttons, more LEDs, more pots, and a MIDI input so that the sequencer could be synced to MIDI clock. My immediate problem was that I’d run out of I/O pins on the Atmega. To extend the I/O capabilities, I needed to add some shift register chips. Below is my first perfboard attempt with 16 buttons and 16 LEDs. You’ll see the four shift register ICs below the buttons (two 74HC595s for the LEDs and two 4021Bs for the buttons).

One look at the spaghetti on the backside and you’ll see why I started to consider having a PCB printed.
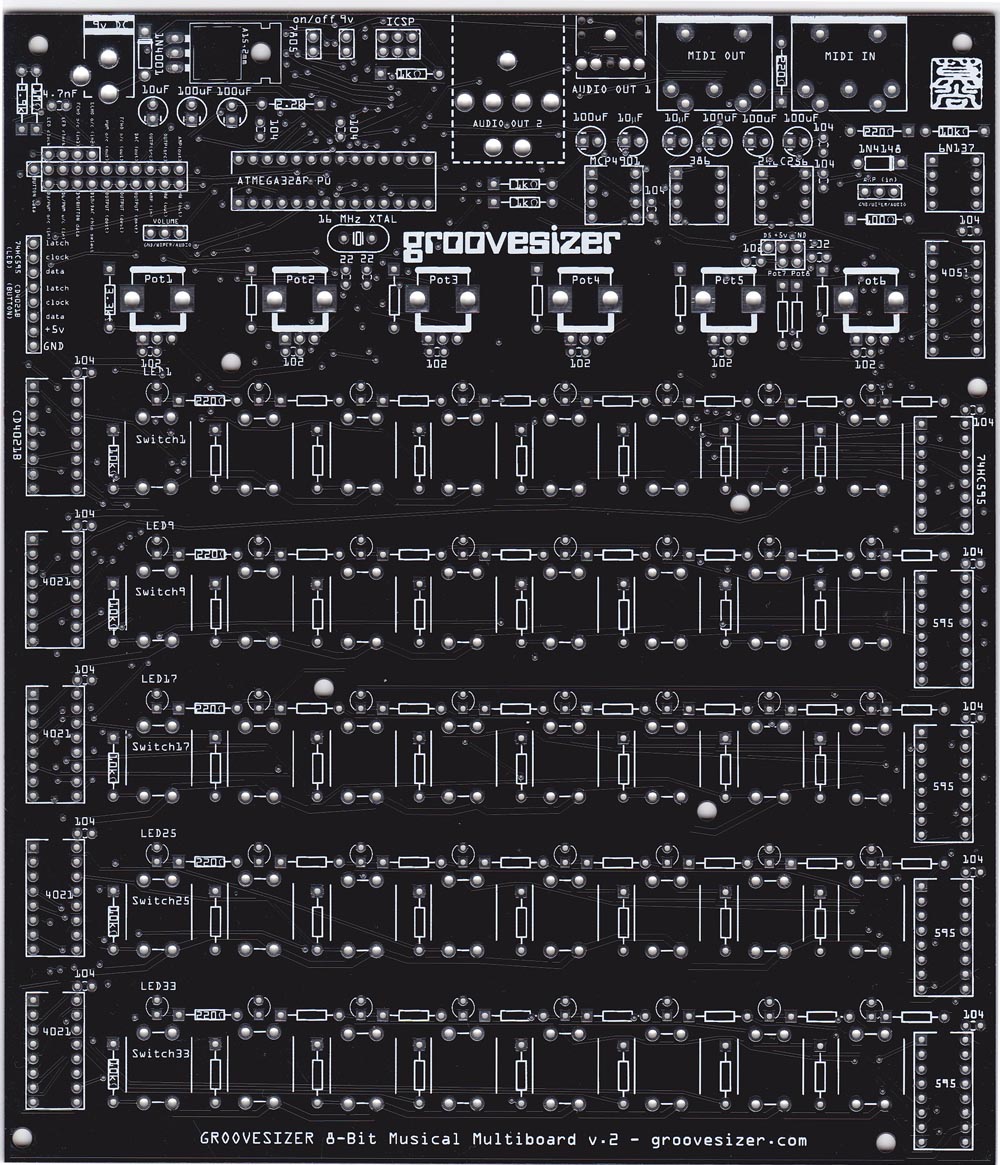
It turns out having a custom PCB manufactured is not prohibitively expensive, so I used the free Fritzing software to design a custom PCB. At this point I wasn’t sure whether I wanted to use PWM or a DAC for sound production, or whether I wanted to include an amp or not, so I decided to include all of the above on the PCB and to selectively build only the parts of the circuit that I wanted to use for a specific project.
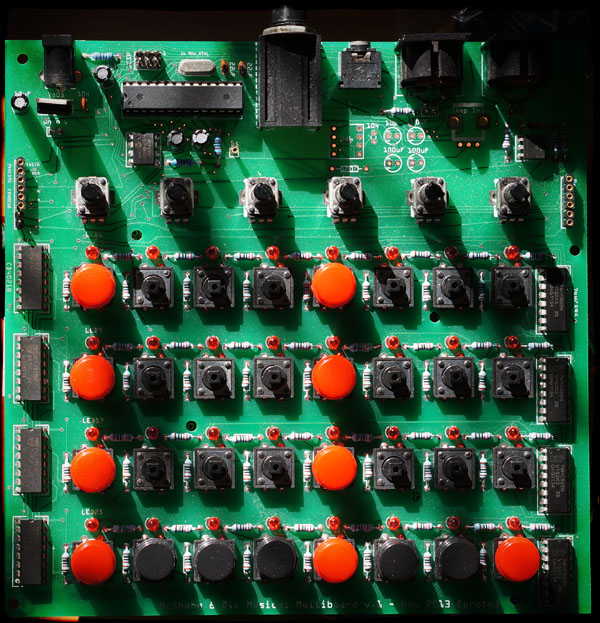
In the latest design I’ve refined the idea so that you now build the board with all the hardware in place, and use jumpers to select the parts of the circuit that you want to use. In this way, I’ve managed to make the one PCB compatible with a bunch of existing Arduino projects (hence the Multiboard title), most notably the Auduino, the Mozzi sound synthesis library, the Illutron 4-voice wavetable synth, and the Bleep Drum (another Arduino derived DIY project).
Over the last couple of months, I’ve been releasing different kinds of firmware that run on the Multiboard – a little like apps for a smartphone. For the most part they’re adaptations of the projects I mentioned above that make specific use of the Groovesizer’s hardware. I’m by no means finished and some of the firmware versions have yet to progress beyond the proof-of-concept stage. Hopefully users of the Groovesizer will be encouraged to experiment and release their own firmware too along the way.
Groovesized!
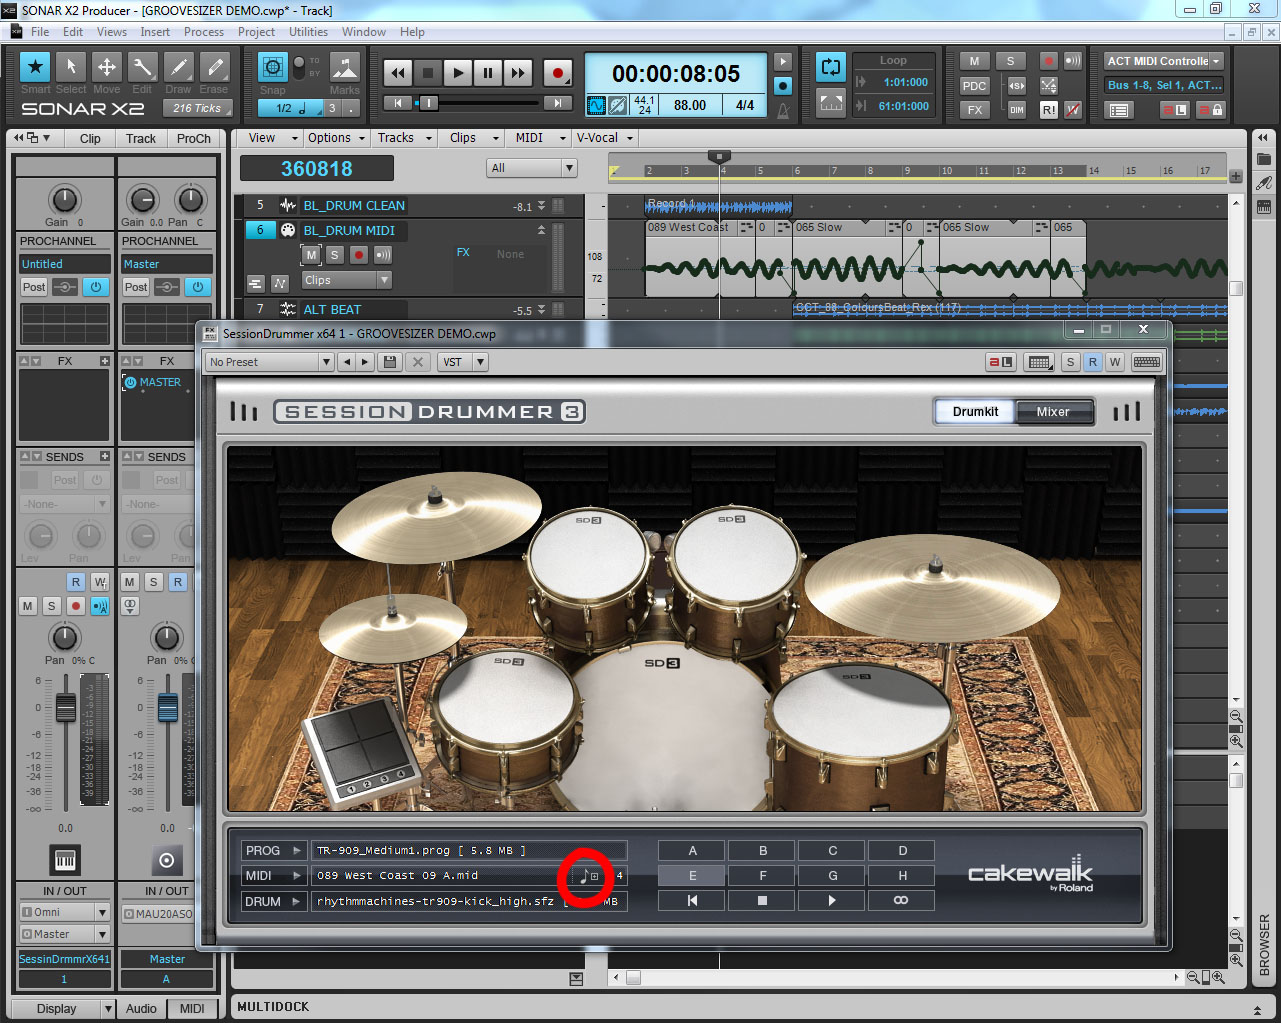
As I mentioned at the start, the demo track is intended to give you some idea of the sounds the Groovesizer MB can make right now. I started by finding a groove I liked in Session Drummer 3. I dragged the MIDI clip from Session Drummer into a seperate MIDI track (drag from the icon circled in red), and quantized the clip with 65% swing.
The Bravo firmware for the Groovesizer MB is based on the Bleep Labs Bleep Drum. When I wrote the track, the Bravo firmware was not yet finished. Luckily the latest version of the Bleep Drum firmware enables MIDI input, so it was possible to load the Groovesizer with the Bleep Drum code and play it via MIDI. I followed this guide to replace the Bleep Drum’s default samples with my own. You’ll notice that I drew in some automation to vary the pitch of the hi-hat sample. Here’s the finished drum loop in isolation.
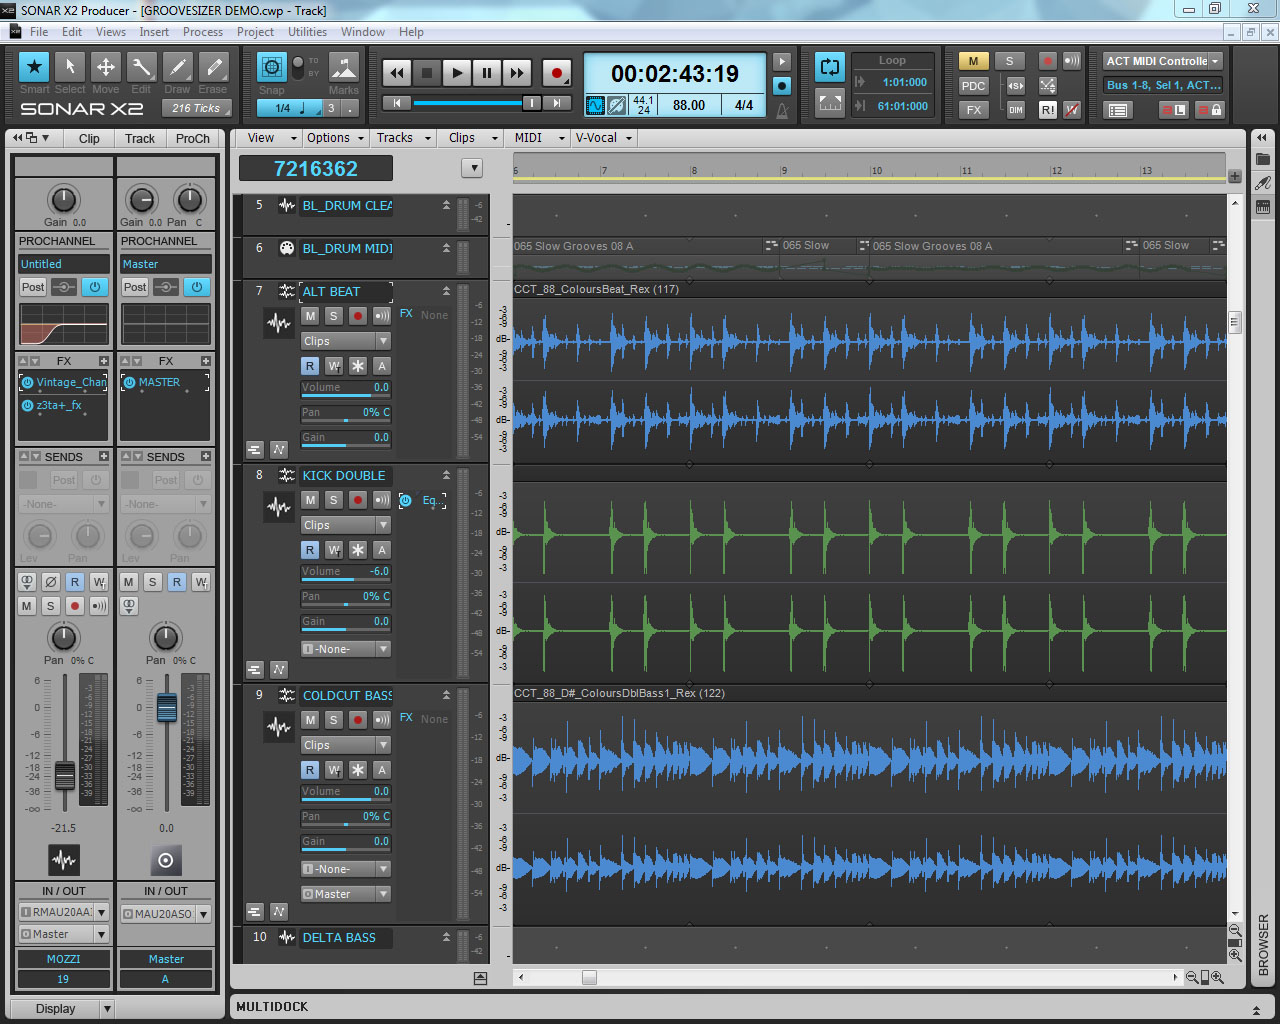
Next, I went through the sample content included with Sonar X2 two and chose two Coldcut loops to build the track around. The two RXP REX loops in question are CCT_88_ColoursBeat_Rex(117), and CCT_88_D#_ColoursDblBass1_Rex(122) – they’re in the Coldcut subfolder of the Loopmasters folder. It provided a nice backdrop to jam over on the Groovesizers. I was shooting for a slightly punchier kick sound, so I rolled off some low-end on the drum loop and layered a second kick sample under it.
I created an alternative version of the Coldcut bassline on a Groovesizer MB with Delta firmware and played around the grain decay settings (sounds a lot like filter cutoff on a low-pass resonant filter).
Staying with the Delta firmware, I made a complimentary pattern that could work on its own or layered with the bass. To create some interest, I transposed the pattern up an octave, shifted it back by a couple of beats, and mixed it with the original.
Next, I loaded the Groovesizer with the Alpha firmware. The Alpha lacks the squelchy lowpass filter-like sound of the Delta, but it has three voices that can be tuned relative to each other to produce chords. I created three similar patterns, one where I automated the pitch of one of the voices to do a gliss up, and two more with slightly different rhythm accents.
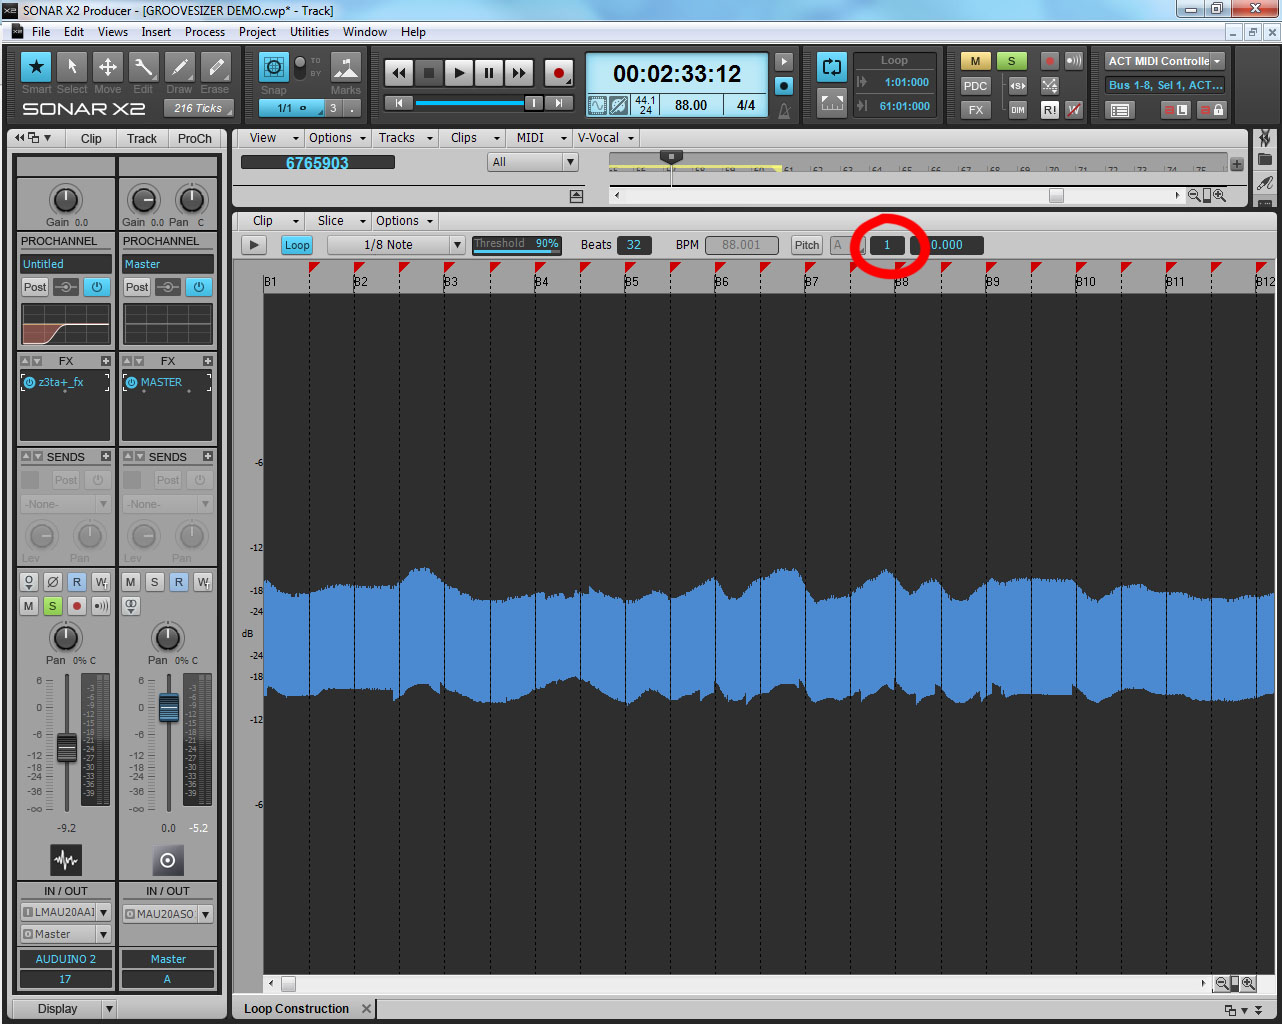
At this point, I felt the track needed a solo break, so I loaded the Groovesizer with the original Auduino code that I’d modified slightly to work with the Groovesizer hardware. The basic Auduino has no gates – instead it produces a continuous tone that can be set up to jump in a pentatonic scale. I played the kind of warbling pentatonic solo with one of the Groovesizer’s potentiometers. It wasn’t in the right key, however, so I converted the whole solo section to a loop (with Control+L) and shifted the loop up by a semitone in the loop construction view.
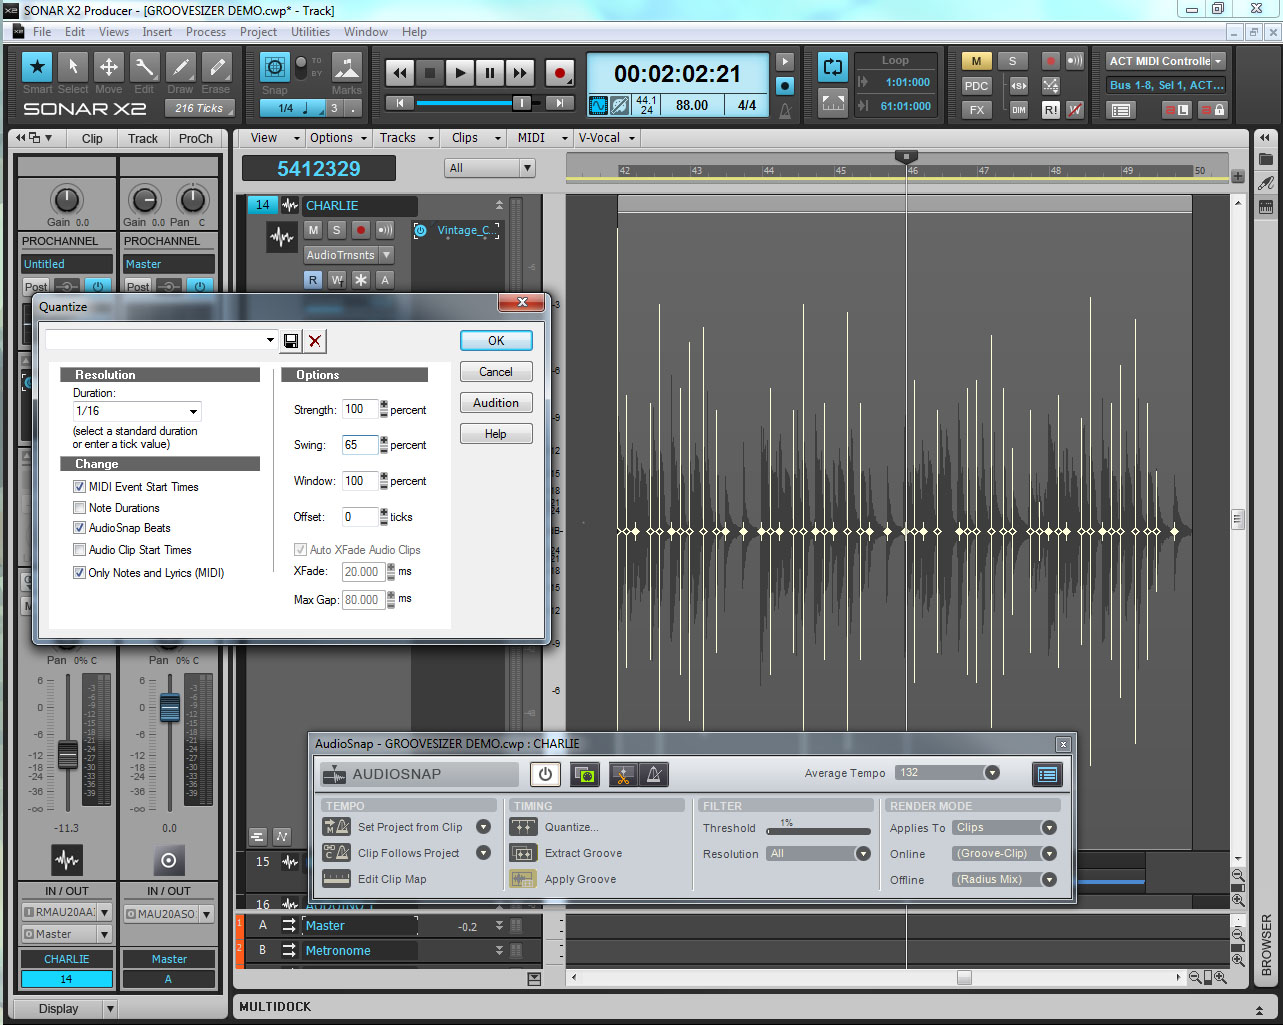
The Charlie firmware is also still at the proof-of-concept stage. It’s based on the Illutron 4-voice wavetable synth, and has a unique character again. At this point you can adjust the tempo, but there’s no MIDI sync yet, and also no swing. Luckily, Sonar provides easy solutions to these problems. I first used Control + drag to align the Charlie loop to the track’s tempo. Then I switched on audio transients for the clip and applied 65% swing from the AudioSnap panel’s Quantize section.
Finally, it was time to add some spice. To create interest here and there, I dropped in small sections from the Auduino solo, but processed it differently. My not so secret weapon for quickly placing sounds is a mix is to use the fx version of z3ta+ and to step through the presets. I usually find something that gets me very close and then I just tweak the effects settings a little from there.

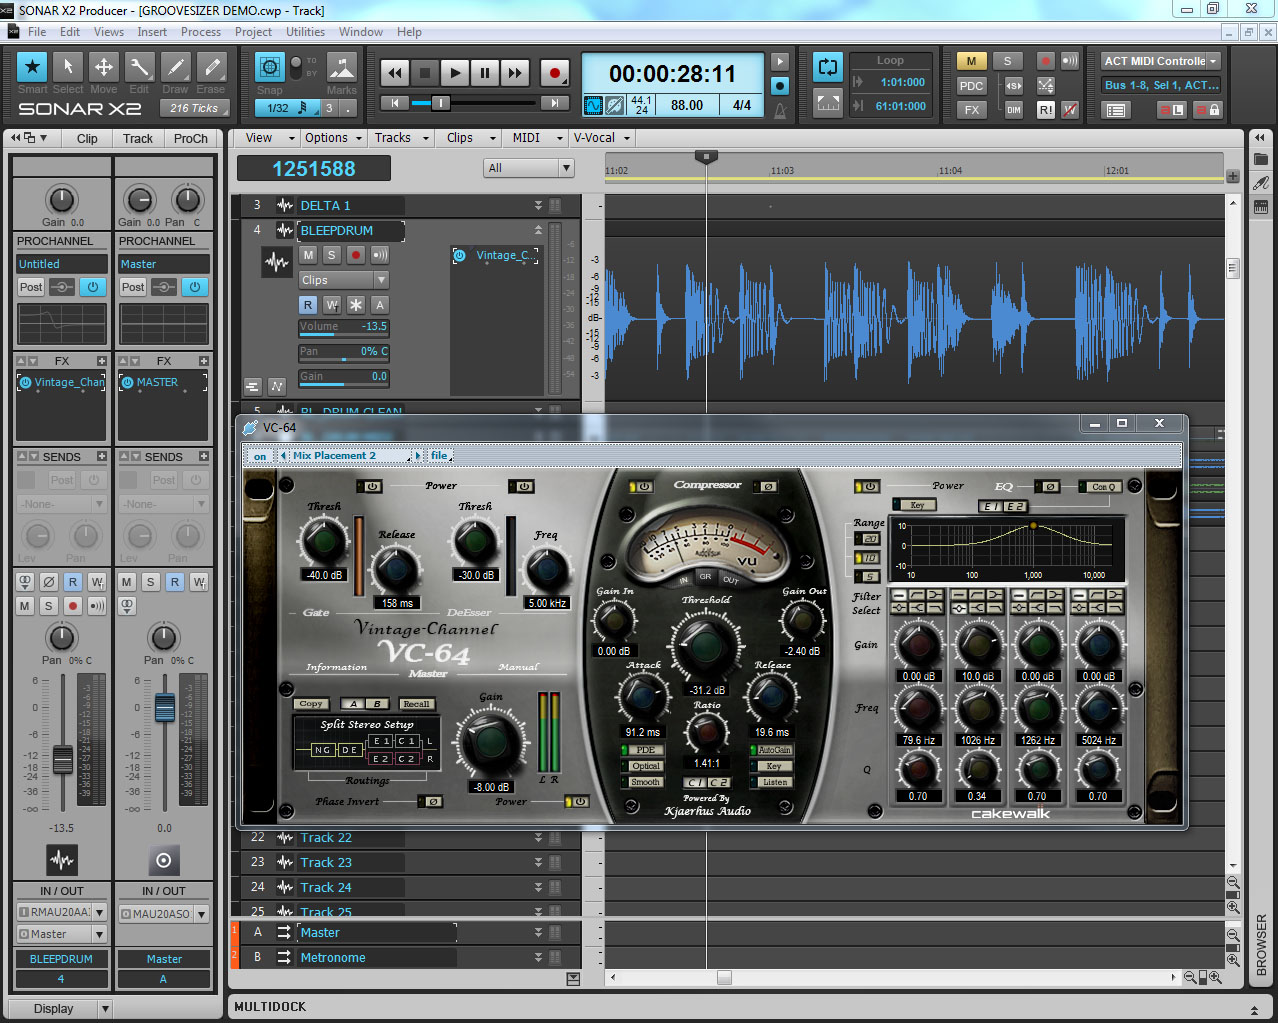
Another of my favorite tools for mix placement is the VC-64 Vintage Channel. I used it here to move the Bleep Drum loop out of the way of the Coldcut drum loop, but still give it its own space in the mix.
Finally, I sprinkled the track with the audio from a video demo I did of the Echo firmware (video at the link)- it’s based on the Mozzi synthesis library and is also only at the proof-of-concept stage.
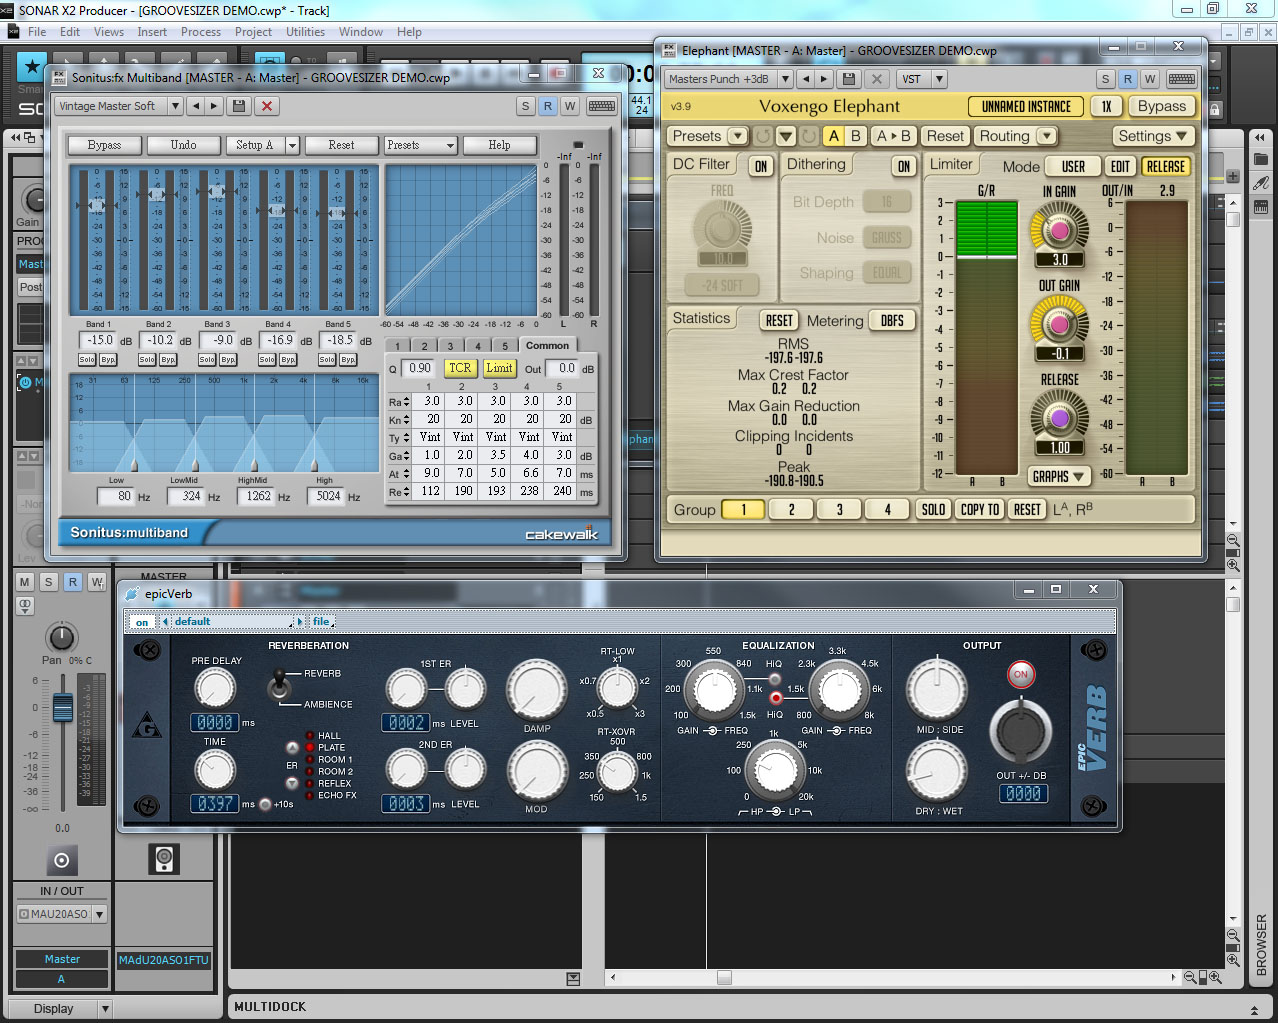
In case you’re curious about the plugins on my master bus – it’s Sonitus: Multiband, followed by a touch of reverb from epicVerb, and Voxengo’s Elephant as my final limiter.
Final thoughts
I’ll be the first to admit that the Groovesizer MB is not for everyone. It can do a surprising number of things, but not all at the same time. The little Atmega328p is taken to the limit tasked as it is with not only handling the user interface, but also producing sound. And as for the sound… it may grow on you as it has on me, but objectively it’s 8-bit grungy at best and ridiculously lo-fi at its worst.
If the sound of the Groovesizer MB is not your cup of tea, it may still earn a place in your setup if you’re looking for a hardware 32-step sequencer to use with your outboard MIDI gear. Although you can enter notes into the Groovesizer’s sequencer by playing them in via MIDI, I find that using the hardware button grid forces you to think about melodies in a different way. You can also let the Groovesizer’s random pattern generators do some of the work for you and let it come up with melodies of its own.
With a plethora of more capable machines around, what sets the Groovesizer apart is that you have complete access to the underlying code that makes it work in probably the most beginner friendly of environments, the Arduino IDE. If you’re interested in learning how these things work, or want to tweak it to work exactly right for you, the Groovesizer is a great place to start.
A couple of months ago, I released a second kit – the Groovesizer RED. This one is a slightly altered version of the Groovesizer mk1 – basically a 16-step version of the Delta firmware. It is an easier kit for beginners and comes with a lower price tag.
 A huge thanks to Cakewalk for being my constant music production partner over the last 20 years, and for allowing me to introduce the Groovesizer to you. Hopefully you’ll pay us a visit at the Groovesizer website some day soon.